Docker-Compose 结合nginx实现跨容器转发
文章目录
开发环境
mac zsh docker-compose
1$ docker-compose --version
2docker-compose version 1.22.0, build f46880f
目录结构
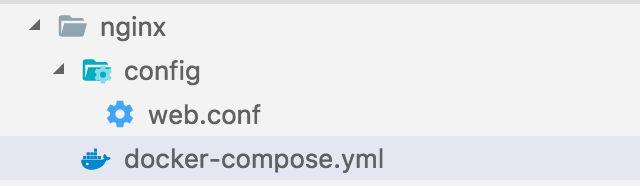
docker-compose.yml
 1version: "3"
 2services:
 3  web: # 服务的名称
 4    image: nginx
 5    volumes: # 文件夹映射
 6      - /Users/cai/Documents/www:/usr/share/nginx/html:ro # 宿主:docker:只读  ,www目录
 7      - ./config/web.conf:/etc/nginx/nginx.conf:ro # nginx配置文件
 8    ports: # 端口转发 宿主:docker
 9      - "8080:80"
10      - "8081:81"
11    # environment:
12    # - NGINX_HOST=foobar.com
13    # - NGINX_PORT=80
14    # command: /bin/bash -c "envsubst < /etc/nginx/conf.d/mysite.template > /etc/nginx/conf.d/default.conf && exec nginx -g 'daemon off;'"
15    networks: ## 定义网络
16      nn: ## 加入的网络的名称
17        ipv4_address: 192.168.5.101 ## ipv4的ip地址
18
19  web8082:
20    image: nginx
21    volumes:
22      - /Users/cai/Documents/www/8082:/usr/share/nginx/html:ro
23    ports:
24      - "8082:80"
25
26    networks:
27      nn:
28        ipv4_address: 192.168.5.102
29
30  web8083:
31    image: nginx
32    volumes:
33      - /Users/cai/Documents/www/8083:/usr/share/nginx/html:ro
34    ports:
35      - "8083:80"
36
37    networks:
38      nn:
39        ipv4_address: 192.168.5.103
40
41networks: ##定义网络组
42  nn: ## 网络组名称
43    driver: bridge ## 网络的模式
44    ipam: ## 配置网络
45      driver: default
46      config:
47        - subnet: 192.168.5.0/24 ## ip地址网络 这里宿主机一般会是该网段的 192.168.5.1,所以不要设置自网段为1
配置服务 配置网络
将服务加入同一个网络组,这样 docker 就可以在同一个网络组里了,由于 docker 的特性,每个容器会认为自己和另一个容器是局域网的关系
我这里做的是 nginx 转发
nginx.conf
 1user  nginx;
 2worker_processes  1;
 3
 4error_log  /var/log/nginx/error.log warn;
 5pid        /var/run/nginx.pid;
 6
 7
 8events {
 9    worker_connections  1024;
10}
11
12
13http {
14    include       /etc/nginx/mime.types;
15    default_type  application/octet-stream;
16
17    log_format  main  '$remote_addr - $remote_user [$time_local] "$request" '
18                      '$status $body_bytes_sent "$http_referer" '
19                      '"$http_user_agent" "$http_x_forwarded_for"';
20
21    access_log  /var/log/nginx/access.log  main;
22
23    sendfile        on;
24    #tcp_nopush     on;
25
26    keepalive_timeout  65;
27
28    #gzip  on;
29
30    # include /etc/nginx/conf.d/*.conf;
31
32
33    server {
34        listen       80;
35        server_name  localhost;
36
37        #charset koi8-r;
38        #access_log  /var/log/nginx/host.access.log  main;
39
40        location / {
41            root   /usr/share/nginx/html;
42            index  index.html index.htm;
43            # proxy_pass http://web8081;
44        }
45
46        error_page   500 502 503 504  /50x.html;
47        location = /50x.html {
48            root   /usr/share/nginx/html;
49        }
50
51        location = /300.html {
52            proxy_redirect off;
53            proxy_pass http://192.168.5.102/index.html; ## 备注1
54        }
55
56        location = /600.html {
57            proxy_redirect off;
58            proxy_pass http://192.168.5.103/index.html; ## 备注2
59        }
60    }
61
62    server{
63        listen 81;
64        server_name localhost;
65
66        location / {
67            root   /usr/share/nginx/html/sub;
68            index  index.html index.htm;
69        }
70    }
71}
备注 1,备注 2 将 300.html 600.html 转发到 103 的 ip 地址 由于 docker 中 nginx 端口默认配置的是 80,所以 http 的端口转发没有端口号 8082 端口 对于 8080 端口默认服务器来讲 ip 地址是 102
启动
1docker up
加 -d 的话就是后台运行, 直接运行可以看见日志
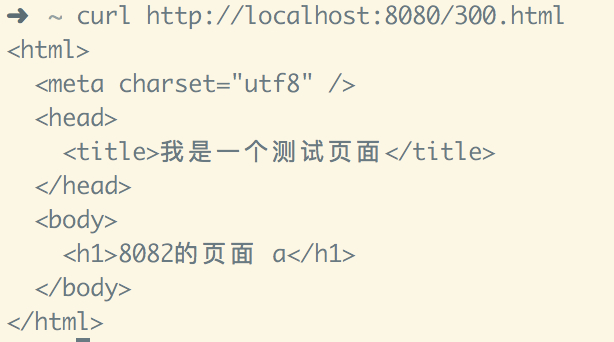
这里测试了一下 可以看到 服务器那边有日志

我们发的请求 8082 的服务器给出了反馈
后记
这里简单记录了下 docker 配合 nginx 达到两个隔离容器间的通信问题
同样的 这里如果用 mysql+服务器 app 程序 也可以达成通信的原理,无非就是换个 ip 地址和通过命令启动服务端程序的问题